

Menilai Keterampilan DIY Anda untuk Pemasangan Kanopi
Persyaratan Tingkat Keterampilan untuk Proyek Kanopi
Sebelum memulai proyek kanopi DIY apa pun, luangkan waktu sejenak untuk mempertimbangkan seberapa mahir Anda sebenarnya dalam hal ini. Pemula sebaiknya mulai dengan proyek dasar terlebih dahulu, misalnya memasang penutup kanvas sederhana. Sementara itu, orang yang sudah berpengalaman dalam pekerjaan serupa dapat menangani pemasangan yang lebih rumit, termasuk berbagai opsi pemasangan dan bahan yang digunakan. Desain juga penting. Model yang rumit dengan beberapa panel dan perlengkapan khusus memerlukan keterampilan yang lebih tinggi dibandingkan pengaturan yang langsung dan sederhana. Ingin meningkatkan kemampuan Anda? Banyak sekali bantuan gratis yang tersedia. Kunjungi YouTube untuk melihat video orang-orang yang benar-benar memasang kanopi mereka sendiri. Beberapa video bahkan menunjukkan kesalahan umum yang harus dihindari. Namun, jangan terburu-buru mengambil proyek di luar batas kemampuan Anda. Pemasangan yang buruk saat ini berarti Anda harus memperbaikinya di kemudian hari—dan tentu saja, tidak ada yang menginginkan hal itu.
Komitmen Waktu dan Pertimbangan Keselamatan
Memperkirakan berapa lama pemasangan kanopi akan memakan waktu sangat penting bagi siapa pun yang mengerjakan proyek ini sendiri. Model sederhana mungkin hanya memerlukan beberapa jam, sedangkan pemasangan yang lebih kompleks bisa memakan waktu hingga beberapa hari, tergantung pada pekerjaan spesifik yang harus dilakukan. Perencanaan yang matang membantu menetapkan ekspektasi yang realistis dan mencegah frustrasi ketika pekerjaan tidak berjalan sesuai jadwal. Keselamatan juga tidak boleh diabaikan. Peralatan pelindung dasar seperti sarung tangan kerja dan kacamata pengaman membuat perbedaan besar saat menangani perangkat keras dan perkakas listrik. Jangan lupa memeriksa juga peraturan bangunan setempat. Pemerintah kota sering kali memiliki aturan tersendiri mengenai struktur luar ruangan yang mungkin mengharuskan izin atau inspeksi sebelum pemasangan diselesaikan. Mengantisipasi persyaratan ini sejak awal akan menghindari masalah di kemudian hari serta penundaan yang tidak perlu.
Peralatan dan Bahan Penting untuk Pemasangan Kanopi
Peralatan Wajib untuk Pemasangan yang Aman
Pemasangan kanopi yang baik dimulai dengan menyiapkan peralatan yang tepat terlebih dahulu. Yang paling tidak dibutuhkan kebanyakan orang adalah bor yang memadai, waterpass yang andal, pita pengukur, serta anchor beton jika dipasang pada permukaan keras. Tanpa perlengkapan dasar ini, pekerjaan cenderung cepat berjalan tidak lancar. Mengeluarkan sedikit biaya tambahan untuk peralatan berkualitas lebih baik justru menguntungkan dalam jangka panjang, karena alternatif yang lebih murah sering kali cepat rusak atau tidak mampu menjalankan tugasnya secara memadai. Aspek keselamatan pun menjadi lebih krusial ketika bekerja dengan peralatan berkualitas rendah. Selalu periksa panduan penggunaan resmi dari produsen alat sebelum memulai pekerjaan. Mematuhi pedoman tersebut membantu mencegah kecelakaan dan memastikan semua komponen berfungsi dengan benar sepanjang proyek. Jujur saja, siapa pun yang pernah kesulitan menggunakan peralatan yang kurang kokoh pasti tahu bahwa peralatan yang baik membuat perbedaan besar antara rasa frustasi dan kepuasan saat memasang sesuatu seperti kanopi.
Memilih Perangkat Keras Berkualitas dan Bahan Pelindung Tahan Cuaca
Perangkat keras sama pentingnya dengan alat yang tepat saat memasang kanopi. Baut dan sekrup berkualitas baik benar-benar berpengaruh karena menjaga stabilitas dan keamanan selama bertahun-tahun ke depan. Memilih perangkat keras kelas atas berarti seluruh instalasi mampu menahan segala kondisi cuaca yang menghadangnya. Perlindungan terhadap cuaca juga tidak boleh diabaikan. Cari komponen seperti fitting tahan karat dan kain yang tahan terhadap kerusakan akibat sinar UV—bahan-bahan ini memberikan dampak besar terhadap masa pakai kanopi sebelum memerlukan perbaikan. Periksa ulasan pengguna lain mengenai berbagai merek secara daring. Pengalaman nyata sering kali menunjuk perusahaan yang dikenal memiliki perangkat keras kokoh dan perlindungan cuaca yang andal. Fokuslah pada detail-detail ini, dan kanopi Anda akan tetap kuat melewati banyak musim, menyediakan naungan andal kapan pun dibutuhkan tanpa masalah perawatan berkelanjutan.
Panduan Bertahap untuk Memasang Kanopi
Persiapan Sebelum Pemasangan: Pengukuran
Mendapatkan pengukuran yang akurat sejak awal membuat perbedaan besar saat memasang kanopi. Siapkan dulu alat-alat dasar Anda—yang kami maksud adalah meteran pita, level, dan mungkin juga pensil untuk menandai titik-titik tertentu. Ukur lebar, tinggi, serta jarak ke belakang yang dibutuhkan kanopi dari dinding. Angka-angka ini sangat penting karena jika terjadi kesalahan sekecil apa pun, seluruh unit mungkin tidak pas atau tidak berfungsi sebagaimana mestinya di kemudian hari. Jika memungkinkan, mintalah bantuan orang lain pada tahap ini. Dua pasang mata akan lebih cepat menangkap kesalahan dibandingkan satu pasang mata, terutama karena tidak ada seorang pun yang ingin membuang waktu untuk mengulang seluruh proses setelah terjadi kesalahan.
Fase persiapan benar-benar memerlukan kesabaran. Ketika orang terburu-buru dalam melakukan pengukuran, mereka sering kali harus membayar konsekuensinya di kemudian hari, misalnya melalui ukuran yang tidak pas atau komponen yang tidak selaras dengan bagian yang sudah ada. Menghabiskan waktu ekstra untuk memastikan segalanya tepat sejak awal akan menghemat banyak masalah di masa depan—ketika tak seorang pun ingin repot menyesuaikan kembali komponen atau memesan ulang. Persiapan yang baik sebelum pemasangan membuat perbedaan besar, menjamin kemajuan yang lebih lancar secara keseluruhan, alih-alih menghadapi penundaan dan masalah menjengkelkan akibat mengambil jalan pintas.
Braket Pemasangan dan Penguncian Rangka
Memasang braket-braket tersebut dengan tepat benar-benar penting jika kita ingin kanopi kami berfungsi dengan baik dan juga terlihat rapi. Mulailah dengan memberi tanda di dinding di tempat masing-masing braket akan dipasang, memastikan tanda-tanda tersebut sejajar dengan garis acuan yang telah digambar sebelumnya saat persiapan pemasangan. Braket-braket ini harus diletakkan rata dan lurus sepanjang dinding, dengan jarak yang merata agar seluruh struktur tetap stabil setelah kanopi terpasang. Gunakan alat waterpass dan pensil untuk membuat tanda-tanda tersebut secara akurat. Sedikit waktu ekstra di tahap ini akan membuat perbedaan besar di kemudian hari, terutama saat menghadapi angin atau hujan.
Memastikan rangka terpasang dengan benar berarti memperhatikan secara cermat panduan pabrikan tersebut. Banyak orang gagal tepat di tahap ini karena memasang braket pada posisi yang salah, sehingga keseluruhan kanopi menjadi goyah seperti kapal di tengah laut bergelombang. Luangkan waktu untuk memastikan semua komponen sejajar lurus sebelum mengencangkan baut sesuai petunjuk dalam buku manual. Braket yang terpasang dengan benar tidak hanya berfungsi secara struktural untuk menahan seluruh bagian, tetapi juga memberikan pengaruh besar terhadap tampilan akhir produk. Tak seorang pun menginginkan kanopi baru mereka tampak miring atau condong ke satu sisi setelah pemasangan selesai. Sedikit perhatian ekstra pada tahap ini akan menghindarkan masalah di kemudian hari.
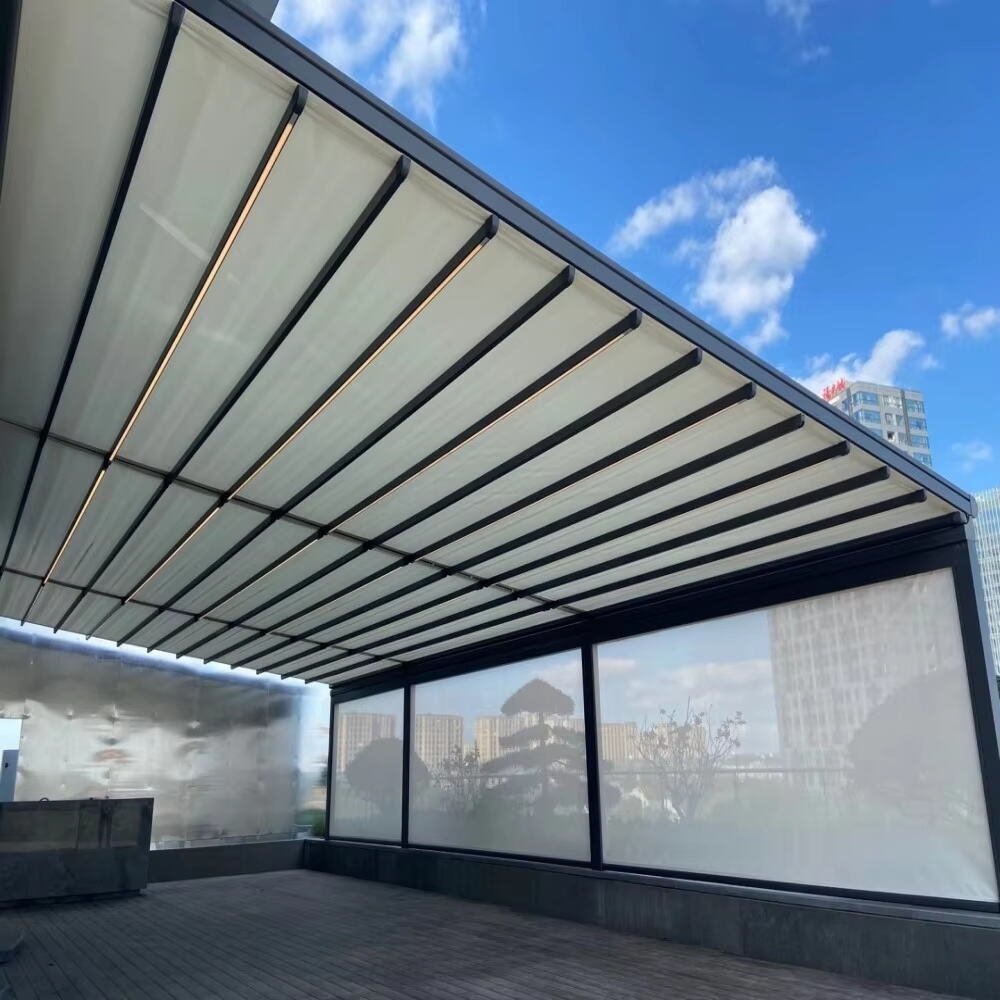
Memasang Kain Kanopi atau Atap
Memasang kain kanopi dengan benar memerlukan ketelitian agar tampilan tetap rapi dan awet dalam jangka panjang. Langkah pertama, periksa panduan pemasangan yang disertakan bersama produk. Panduan tersebut menunjukkan secara tepat di mana posisi pengencang harus dipasang agar menghasilkan pegangan yang kokoh. Kami bertujuan memasang kain dengan ketegangan yang cukup sehingga tidak terdapat tonjolan atau kendur yang terlihat. Kerutan hanya akan menimbulkan masalah di kemudian hari karena bagian tersebut akan aus lebih cepat dibandingkan area yang rata. Mendapatkan ketegangan yang tepat benar-benar membuat perbedaan besar. Kain akan lebih tahan terhadap cuaca bila ditarik kencang, dan tentu saja, tak seorang pun menginginkan kanopi mereka tampak kendur hanya dalam beberapa minggu setelah dipasang di pasaran.
Ketika orang mengikuti petunjuk pabrikan mengenai pemasangan kain, mereka umumnya memperoleh hasil yang lebih baik karena seluruh proses berjalan lebih lancar. Sebagian besar buku petunjuk pengguna bahkan memberikan saran yang cukup baik mengenai tingkat ketegangan kain yang ideal agar tidak kendur seiring waktu. Para pembuat produk ini mengetahui dengan pasti apa yang paling efektif berdasarkan pengalaman bertahun-tahun. Jika seseorang melewati beberapa langkah dalam petunjuk atau mengabaikannya sama sekali, pemasangan mungkin tampak baik pada awalnya, tetapi masalah cenderung muncul kemudian—misalnya saat hujan meresap atau kain mulai meregang secara tidak merata. Penutup yang dipasang dengan benar tidak hanya lebih tahan lama, tetapi juga terlihat jauh lebih rapi di halaman atau area teras tempatnya berada setiap hari.
Tantangan Umum dan Cara Mengatasinya
Mengatasi Permukaan Tidak Rata atau Masalah Perataan
Masalah yang benar-benar menjengkelkan selama pemasangan kanopi sering kali muncul akibat permukaan tanah yang tidak rata atau kesulitan dalam penyetelan posisi. Lakukan pemeriksaan menyeluruh terlebih dahulu pada lokasi pemasangan kanopi, dan perhatikan area-area yang berpotensi menimbulkan masalah penyetelan di kemudian hari. Waspadai hal-hal seperti kemiringan yang jelas terlihat atau celah antara dinding dan struktur penyangga yang dapat menimbulkan masalah di masa depan. Ketika menghadapi kendala semacam ini, kebanyakan orang menemukan bahwa penggunaan bahan pemberi ketinggian (shim) atau perlengkapan pemasangan yang dapat disetel sangat efektif untuk meratakan posisi serta memastikan semua komponen terpasang dengan tepat. Ketepatan penyetelan tidak hanya berdampak pada tampilan estetisnya saja, tetapi juga memengaruhi kinerja harian kanopi dan umur pakainya secara keseluruhan. Menghabiskan waktu ekstra di tahap awal untuk memperbaiki masalah-masalah kecil ini akan memberikan hasil yang sangat menguntungkan dalam jangka panjang.
Memastikan Ketahanan terhadap Cuaca dan Sistem Drainase yang Tepat
Memilih kanopi yang tahan terhadap cuaca buruk dan memiliki sistem drainase yang baik membuat perbedaan besar terhadap masa pakainya. Ketika terlindungi secara memadai dari hujan dan sinar matahari, sebagian besar kanopi akan bertahan lebih lama—sering kali bertahun-tahun lebih lama—tanpa kehilangan penampilannya yang tetap prima. Kemiringan kecil pada pemasangan membantu air mengalir turun, bukan menggenang di permukaan, sehingga mencegah kerusakan akibat pembusukan kain atau rangka. Banyak tenaga pemasang merekomendasikan sudut kemiringan yang ringan agar air tidak tertahan dan menimbulkan masalah di kemudian hari. Mengikuti tips dasar ini tidak hanya memperpanjang masa pakai serta kinerja optimal kanopi, tetapi juga mengurangi kebutuhan perbaikan dan penggantian seiring waktu—yang pada akhirnya menghemat biaya.
Merawat Kanopi untuk Memperpanjang Masa Pakai
Tips Pembersihan dan Pemeriksaan Rutin
Menjaga kebersihan kanopi dan memeriksanya secara rutin membantu memperpanjang masa pakainya serta membuatnya tetap terlihat bagus dalam waktu yang lebih lama. Tanpa perawatan yang tepat, kotoran, jamur, dan berbagai kotoran eksternal lainnya akan mulai menumpuk pada kain, yang pada akhirnya merusak bahan tersebut. Kebanyakan orang menemukan bahwa mencampur sabun lembut dengan air hangat memberikan hasil terbaik. Gunakan sikat lembut dan gosok permukaan secara ringan. Beri perhatian ekstra pada area-area di mana kelembapan cenderung mengumpul, karena lokasi-lokasi inilah yang paling rentan terhadap pertumbuhan jamur dan jamur hitam. Hindari penggunaan pembersih kimia keras atau benda apa pun dengan bulu sikat kaku, karena bahan-bahan tersebut justru dapat merusak serat kain seiring waktu.
Selain pembersihan rutin, melakukan pemeriksaan berkala berdasarkan musim merupakan langkah yang masuk akal untuk mendeteksi dini tanda-tanda keausan dan kerusakan. Saat melakukan pemeriksaan ini, periksalah secara cermat semua komponen logam—misalnya adanya karat, baut yang mulai kendur, atau masalah struktural lainnya yang berpotensi melemahkan keseluruhan unit seiring berjalannya waktu. Kebanyakan orang menemukan bahwa pemeriksaan ini paling efektif dilakukan minimal sekali per musim, dengan memperbaiki masalah kecil secara langsung sebelum berkembang menjadi persoalan besar di kemudian hari. Perawatan semacam ini tidak hanya menjaga penampilan kanopi tetap baik, tetapi juga memastikan fungsinya tetap andal saat dibutuhkan paling mendesak.
Perawatan Musiman untuk Perlindungan Sepanjang Tahun
Perawatan musiman benar-benar penting untuk menjaga kanopi tetap terlindungi sepanjang tahun. Musim dingin membawa masalah tersendiri akibat tumpukan salju yang menumpuk, sedangkan panasnya musim panas dapat menyebabkan jenis keausan dan kerusakan berbeda pada bahan-bahannya. Menyusun daftar periksa terpisah untuk hal-hal yang perlu diperhatikan selama setiap musim memang masuk akal guna perawatan yang tepat. Ambil contoh musim gugur sebagai waktu yang tepat untuk membersihkan daun-daun dan kotoran lain yang jatuh ke atas kain, sebelum kotoran tersebut menimbulkan noda permanen atau masalah struktural di masa depan.
Selama bulan-bulan basah di musim semi dan musim panas, masuk akal untuk memastikan saluran air teras berfungsi dengan baik sehingga mampu menangani seluruh air hujan yang mengalir. Hal lain yang juga perlu diperiksa adalah apakah ada area di permukaan kain tempat jamur atau lumut mulai tumbuh. Namun, ketika musim dingin tiba, kondisinya sedikit berubah. Menarik kembali teras sering kali menjadi suatu keharusan hanya untuk mencegah penumpukan salju tebal yang dapat menyebabkan kerusakan seiring waktu. Catatan perawatan yang baik sangat membantu di sini karena mengingatkan kita tentang apa saja yang perlu dilakukan pada setiap musim guna mempertahankan kinerja optimal struktur luar ruangan kita dari tahun ke tahun.
Mengajak profesional memeriksa kondisi awning sekali dalam setahun masuk akal jika yang dimaksud adalah perawatan yang benar-benar tepat. Para ahli ini mampu mendeteksi masalah sebelum berkembang menjadi gangguan besar, serta benar-benar menilai seberapa kokoh struktur awning setelah sekian lama digunakan. Kerusakan akibat pemakaian rutin biasanya tidak disadari kebanyakan orang hingga terlambat. Tindakan yang dilakukan para profesional jauh melampaui sekadar pembersihan atau pengencangan baut. Mereka sangat memahami cara menjaga agar penutup kain tetap berfungsi optimal sekaligus tetap tampak menarik dari luar. Perbedaan antara perawatan rutin dan membiarkan alam mengambil alih? Tentu saja, tak seorang pun ingin ruang terbuka mereka rusak akibat keruntuhan kanopi saat acara barbekyu musim panas.
Pertanyaan yang Sering Diajukan
Keterampilan apa saja yang diperlukan untuk pemasangan awning secara mandiri (DIY)?
Keterampilan yang dibutuhkan dapat bervariasi, mulai dari dasar hingga tingkat lanjut, tergantung pada tingkat kerumitan proyek. Pemula sebaiknya memulai dengan pemasangan sederhana, sedangkan pelaku DIY yang lebih berpengalaman dapat menangani desain yang rumit. Meningkatkan keterampilan melalui tutorial daring juga sangat membantu.
Berapa lama waktu yang dibutuhkan untuk memasang kanopi?
Waktu yang diperlukan bervariasi tergantung pada tingkat kompleksitas proyek, mulai dari beberapa jam hingga beberapa hari. Perencanaan yang matang dan pengelolaan waktu yang baik merupakan kunci keberhasilan.
Apa saja peralatan penting yang diperlukan untuk pemasangan kanopi?
Peralatan penting meliputi bor, waterpass, meteran gulung, dan jangkar beton. Peralatan berkualitas tinggi menjamin pemasangan yang stabil dan tahan lama.
Bagaimana cara memastikan kanopi saya tahan cuaca?
Menggunakan bahan tahan cuaca—seperti perlengkapan tahan karat dan kain tahan sinar UV—membantu memastikan ketahanan terhadap segala kondisi cuaca.
Mengapa perawatan rutin penting bagi kanopi?
Perawatan rutin memperpanjang umur pakai kanopi, mencegah kerusakan akibat faktor lingkungan, serta menjamin kelangsungan fungsi dan daya tarik estetikanya.
Daftar Isi
- Menilai Keterampilan DIY Anda untuk Pemasangan Kanopi
- Peralatan dan Bahan Penting untuk Pemasangan Kanopi
- Panduan Bertahap untuk Memasang Kanopi
- Tantangan Umum dan Cara Mengatasinya
- Merawat Kanopi untuk Memperpanjang Masa Pakai
-
Pertanyaan yang Sering Diajukan
- Keterampilan apa saja yang diperlukan untuk pemasangan awning secara mandiri (DIY)?
- Berapa lama waktu yang dibutuhkan untuk memasang kanopi?
- Apa saja peralatan penting yang diperlukan untuk pemasangan kanopi?
- Bagaimana cara memastikan kanopi saya tahan cuaca?
- Mengapa perawatan rutin penting bagi kanopi?